
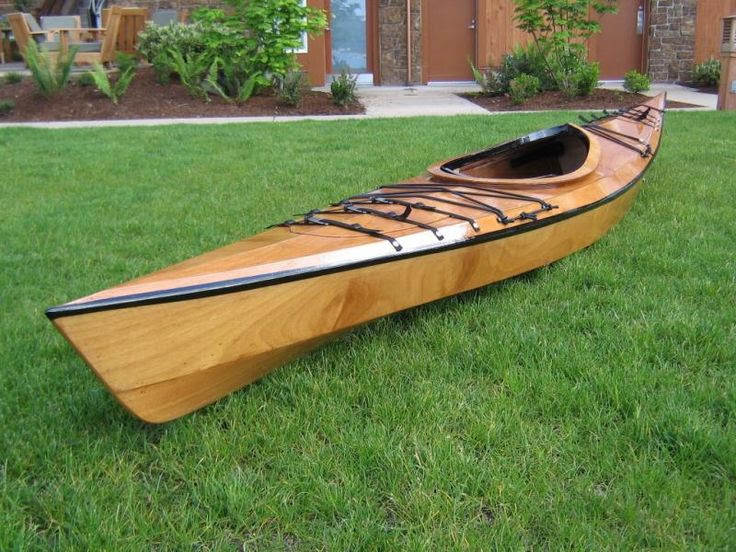
Building a Wooden Kayak: A Journey into Crafting Your Own Watercraft
Hey there, fellow water enthusiast! Ever dreamt of gliding through the serene waters in a kayak you crafted with your own two hands? Building a wooden kayak isn't just about constructing a vessel; it's about embarking on a rewarding journey of skill, patience, and dedication. This article will guide you through the process, step by step, to help you realize your dream.
Imagine the satisfaction of launching your very own, hand-built wooden kayak. The smooth lines, the natural warmth of the wood, the whisper of the water as you glide â€" it's a feeling unlike any other. Ready to dive in? Let's get started!
Choosing the Right Kayak Design
Before you jump into the deep end, let's pick the perfect kayak design for your needs.
Kayak Types
There are many types of kayaks out there, each designed for a specific purpose. Do you crave thrilling whitewater adventures? Are you more interested in leisurely paddling on calm lakes? Consider these popular options:
- Recreational Kayaks: Ideal for beginner paddlers and casual day trips. They tend to be wider and more stable.
- Touring Kayaks: Designed for longer expeditions, they offer a good balance of speed, stability, and cargo capacity.
- Whitewater Kayaks: Built for maneuvering through rapids and challenging water conditions, they are shorter, more maneuverable, and designed for rolling.
- Sea Kayaks: For ocean paddling and exploring coastal waters. They're longer, narrower, and designed for rougher water conditions.
Finding the Right Plans
Now, let's find the perfect kayak plans. You'll find a vast array of plans online and in woodworking books. Here are some factors to consider:
- Skill Level: Choose plans that match your woodworking experience. Beginner plans often use simpler construction methods and less complex shapes. Advanced plans may involve more intricate techniques and require a greater level of skill.
- Materials: Think about the type of wood you want to use. Cedar and spruce are popular choices for their lightweight and strength, but other hardwoods like oak and cherry can also be used. The plans will often specify the recommended wood types.
- Design Features: Consider the desired length, width, and overall shape. These factors will affect the kayak's performance and handling.
Gathering Your Tools and Materials
With your plans in hand, it's time to gather your tools and materials. This is where the fun (and maybe a little bit of shopping) begins!
Essential Tools
- Hand Planes: For shaping the wood and creating smooth surfaces.
- Saws: A handsaw for rough cuts and a fine-tooth saw for precise cuts.
- Chisels: For carving and shaping details.
- Clamps: For securing pieces while you work.
- Sandpaper: Various grits for smoothing and finishing the wood.
- Measuring Tapes and Rulers: For accuracy and precision.
- A Drill and Drill Bits: For pilot holes and securing fasteners.
Essential Materials
- Wood: Select the wood types specified in your plans, ensuring they are of high quality and free from knots and defects.
- Epoxy Resin: For bonding and sealing the wood.
- Fiberglass Cloth: For reinforcing the kayak and adding strength.
- Wood Filler: For filling gaps and imperfections.
- Marine Paint: For a durable and water-resistant finish.
- Hardware: Includes screws, nuts, bolts, and other fasteners needed for assembly.
Building Your Kayak â€" Step-by-Step
Now, let's get our hands dirty and build our kayak! The steps will vary depending on your chosen plan, but here's a general outline:
Step 1: Cutting and Shaping the Wood
Use your plans as a guide to cut and shape the individual wood components for the hull, deck, and other structural parts. Take your time, double-check your measurements, and work carefully to ensure precise cuts and smooth surfaces.
Step 2: Assembling the Hull
Start by assembling the hull, often referred to as the "skeleton" of your kayak. Use epoxy resin to bond the individual planks together. This step requires patience and attention to detail to ensure a strong and watertight hull.
Step 3: Adding the Deck
Once the hull is cured, you can build the deck. Follow the plans carefully to create the desired shape and secure it to the hull. Again, epoxy resin is your trusty friend for bonding and sealing.
Step 4: Finishing Touches
It's time to give your kayak a final touch. Use wood filler to smooth out any imperfections. Sand all surfaces thoroughly and apply marine paint for a durable and water-resistant finish.
Step 5: Adding the Extras
Outfit your kayak with necessary features like seats, footrests, and hatches. Follow the instructions in your plans for the proper placement and installation of these components.
The Finishing Touches and Launching Your Kayak
With your kayak built and ready to go, it's time to celebrate your accomplishment. You've put in a lot of hard work, and now it's time to experience the fruits of your labor.
Here are some final tips before your maiden voyage:
- Double-check everything: Make sure all fasteners are secure, the hull is watertight, and your kayak is ready to face the water.
- Get comfortable: Take some time to get used to your kayak's handling and adjust the seats and footrests for maximum comfort.
- Start small: Begin with a practice session in a calm body of water. Get the feel for your kayak's movement and develop your paddling skills.
As you glide through the water, feel the pride of a master craftsman! You've not only built a beautiful vessel but also created a connection to the natural world. Enjoy your hand-built wooden kayak, and embrace the joy of paddling your own creation.
Commonly Asked Questions
How long does it take to build a wooden kayak?
Building a wooden kayak can take anywhere from several weeks to several months, depending on your experience, the complexity of the design, and the time you dedicate to the project.
What are the costs involved in building a wooden kayak?
The cost of building a wooden kayak can vary significantly depending on the type of wood, tools, and materials you use. It's best to factor in the cost of plans, wood, epoxy resin, fiberglass cloth, paint, and other necessary hardware.
Is building a wooden kayak difficult?
Building a wooden kayak can be challenging but incredibly rewarding. Start with a plan that suits your skill level and be patient as you learn the techniques involved. Don't be afraid to ask for help from experienced woodworkers or join a kayak building community.
Are there any safety considerations when building a wooden kayak?
Absolutely! Always wear safety goggles and protective gear when working with power tools and sharp objects. Ensure proper ventilation when working with epoxy resin and follow the manufacturer's safety guidelines.
Now, go forth and conquer the world of wooden kayak building! You've got this!
0 comments:
Post a Comment
Note: Only a member of this blog may post a comment.